This project stems from my desire to create a Geiger clicker using salvaged materials. Unlike a Geiger counter, which measures the intensity of beta and/or gamma radiation, a Geiger clicker is a simpler device that emits an audible click every time the Geiger tube interacts with an ionizing particle or photon, triggering a Townsend avalanche discharge.
The utility of this device lies in its ability to provide an intuitive understanding of the presence of radioactivity. By listening to the frequency of the clicks, one can gauge the intensity of the radioactive source. This makes it particularly useful for locating radioactive rock samples in nature, among other applications.
Components and Materials
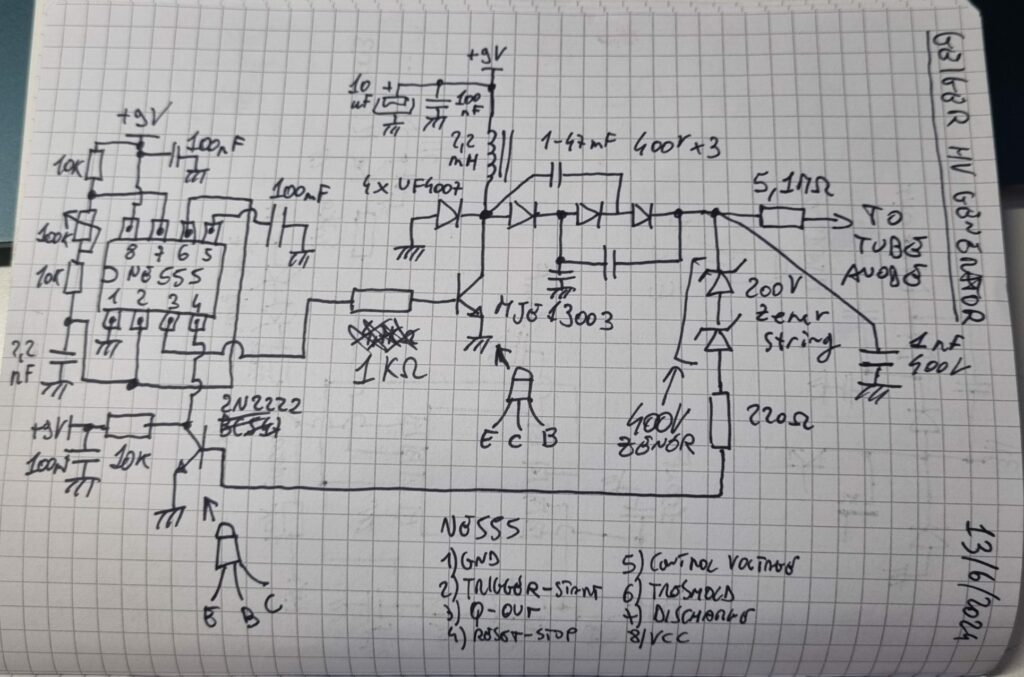
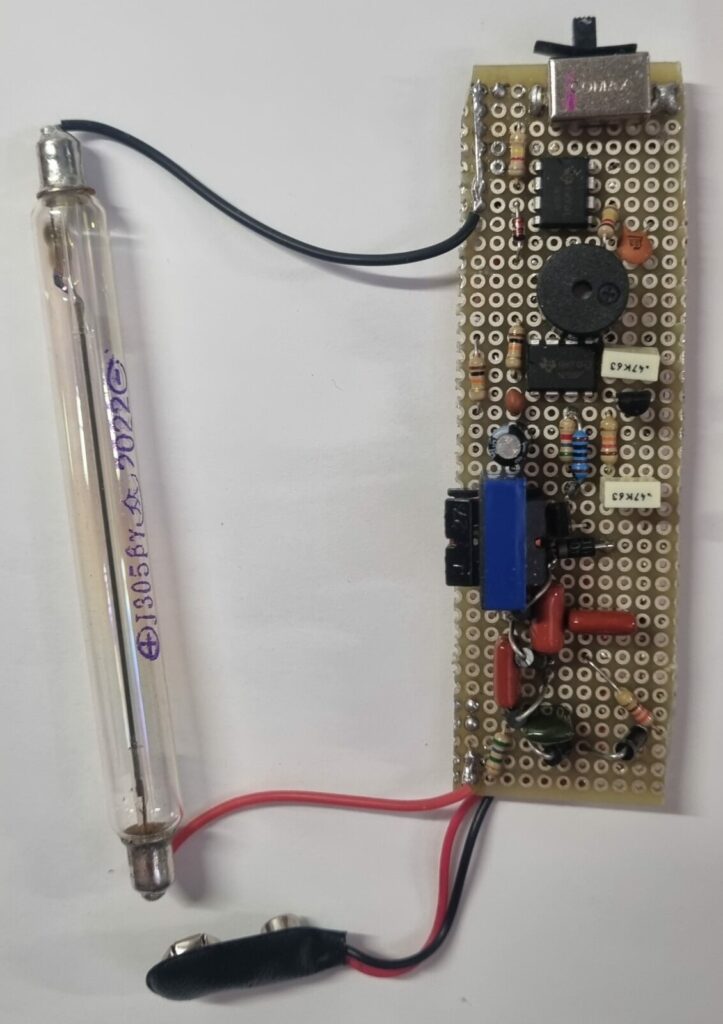
Most of the components I decided to recycle come from the circuits found in compact fluorescent lamps (CFLs), which were common before the widespread adoption of LED lighting. The Geiger tube I used, a J305, was sourced from AliExpress. Unfortunately, due to its fragile glass construction, it broke while I was assembling the circuit. I replaced it with a similar tube. Any Geiger tube that operates at 400V will work; if your tube requires a different voltage, you will need to adjust the Zener diode string to achieve the correct high voltage. For higher voltage requirements, additional Zener diodes can be added in series as needed.
The two NE555 integrated circuits are not recycled but rather repurposed from my lab, where they had been unused for years.
Circuit Diagrams
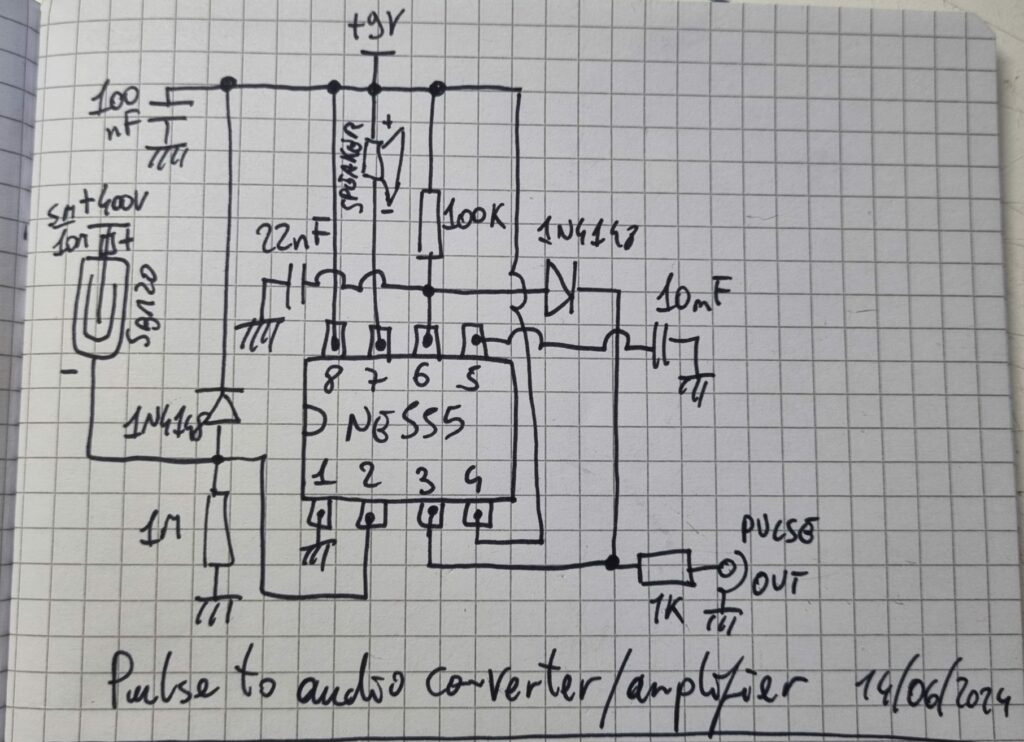
Here are the schematic diagrams of the circuit for better understanding and replication:
Circuit Operation
The first NE555, positioned on the left, functions as a square wave generator with a frequency adjustable between 2 to 20kHz using a 100k potentiometer. It should be set for maximum efficiency (minimum current draw in output mode) based on your inductor. My inductor, taken from a CFL circuit, operates efficiently at around 10kHz.
The second NE555 generates an audio pulse to drive a small buzzer, sourced from an old PC motherboard, whenever there is a pulse on pin 2 from the Geiger tube. The circuit is powered by a 9V “transistor radio” battery.
Assembly and Enclosure
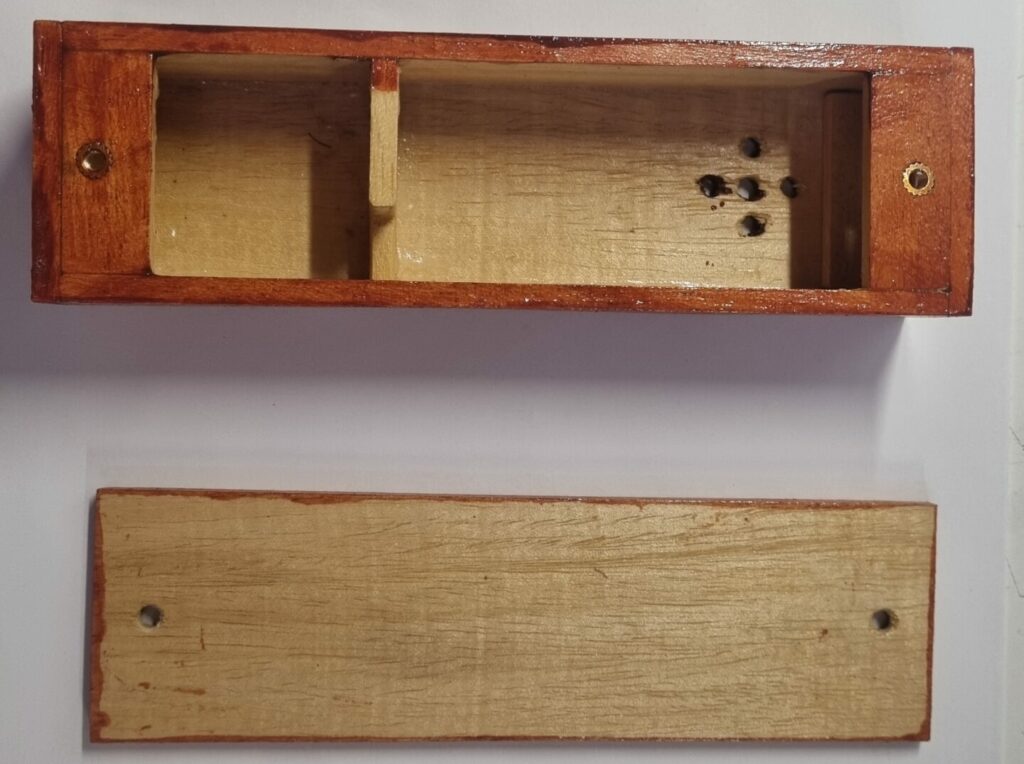
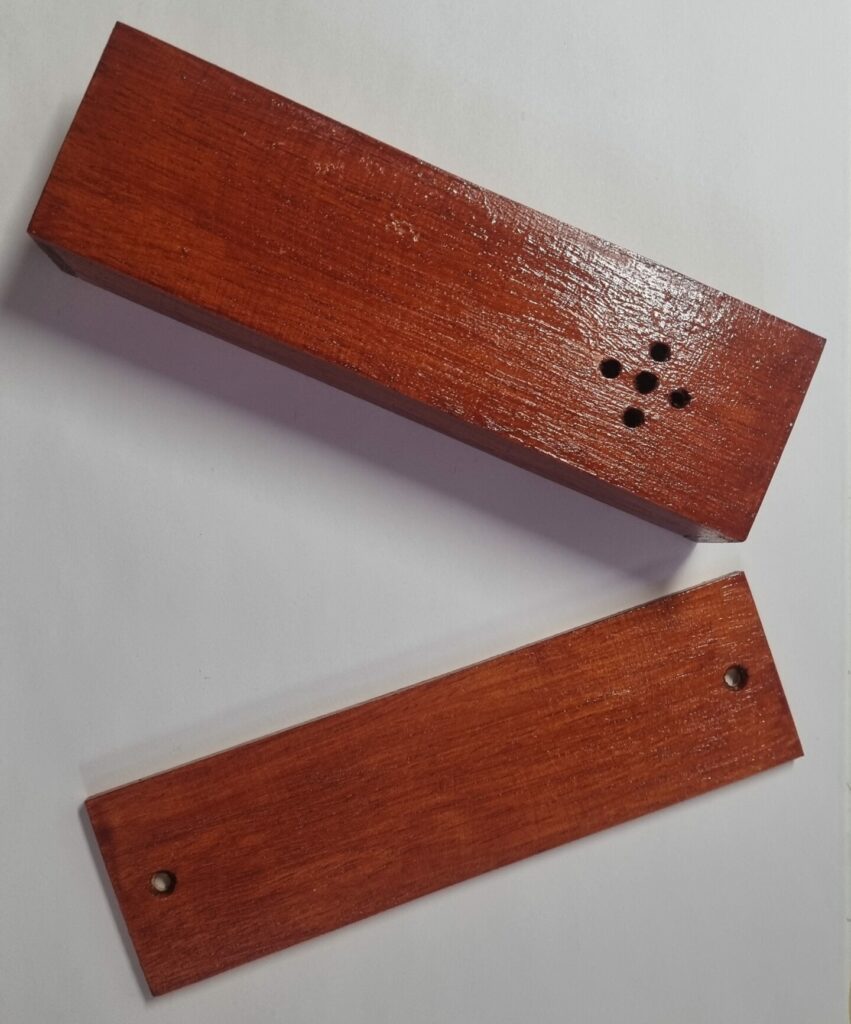
Below are images of the actual assembled circuit and the handcrafted wooden enclosure:
The enclosure for the circuit was handcrafted using small hobbyist wood strips, glued with PVA glue, sanded, and stained in a walnut color. This DIY approach allows for creativity and personalization.
With a fully charged 9V battery, the circuit consumes 12-17mA. If the audio level seems too low, you can replace the salvaged buzzer with a generic earphone.
Conclusion
This project demonstrates how to repurpose old electronic components to create a functional and educational tool. It’s a fun and rewarding experience, perfect for hobbyists and those interested in radiation detection. Happy building!